Monday, September 3, 2012

Gluten Free Chicken Nuggets - Freezable!

Gluten Free Chicken Nuggets - Freezable!

I froze these from raw so they would come out moist and crispy.  You can cook them, freeze them and warm them also.  

2lbs Boneless Skinless Chicken breasts, cut into nugget size chunks
Brine Ingredients:
 2c. water
 1tsp. salt
 1Tbsp. Worcestershire Sauce (Gluten Free!)

Dry Breading Ingredients:
1 c. GF breadcrumbs or crushed tortilla chips
1/2 c. Parmesan Cheese
1/4 c. Chopped fresh parsley
1/4 tsp. Garlic Powder
1/2 tsp. Black Pepper
1/2 tsp. Sea Salt

2 large Eggs

Combine Brine ingredients in a large bowl and stir until salt dissolves into the water.  Add cut up chicken breasts into the brine.  Allow to sit for 30 minutes.  This flavors the chicken itself and keeps the meat moist and flavorful.  Beat Eggs and place in a bowl.  Combine dry ingredients and place in another large bowl.  

On a paper towel, remove chicken from brine and pat dry.  Place the chicken in the beaten eggs, then turn chicken pieces in the breading mixture until well coated.  Then transfer breaded nuggets to parchment lined baking sheets.  At this point you can freeze them.  Put baking sheet in the freezer for about 2 hours, once frozen solid you can transfer them to baggies and keep for up to 3 months.  

To cook them you can either fry them or bake them.  If baking, if you drizzle them with melted butter before baking you will get that golden brown color.  Enjoy!

Gluten Free Meatballs.... YUMMMM!

Basic Gluten Free Meatballs - Freezable!

Preheat oven to 400 degrees. Line baking sheets with parchment paper (optional.)

1 lb. ground chuck
1 lb. ground pork
1 egg
1/2c. Parmesan Cheese
1/2c. Buttermilk
1/2c. Gluten Free Quick cooking Oats (I used Bob's Red Mill)
1/4c. Chopped fresh parsley
1/2c. Finely chopped or grated carrot (optional... I like to sneak in extra veggies)
1 1/2 tsp. sea salt
1 tsp. black pepper
1/2 tsp. garlic powder
1 Tbsp. Worcestershire Sauce (make sure it's Gluten Free)

In a bowl, combine ground beef & ground pork until well mixed.  Next dump in oats, buttermilk, and the egg.  I like to put the buttermilk & egg over the oats so they soak up some of the moisture.  Next add in the Parmesan cheese (I use good quality, freshly grated Parmesan,) parsley, carrot, salt, pepper, & garlic powder.  With your hands mix all the ingredients just until combined.  Do not over mix or your meatballs with turn out tough. 

I like to use my 1 oz. cookie scoop to help me keep my meatballs the same size.  I also like my meatballs small so this works out perfect for me.  I use the scoop as a measure, then I roll the meatball in my hands and transfer to a parchment lined baking sheet. (The parchment is there simply to make clean up easier & help prevent sticking which can result in your meatballs falling apart when you are trying to remove them from the cookie sheet.) I can fit 40 meatballs on my baking sheet, leaving about an inch between each ball.  

Next you bake them in a 400 degree oven for 20 minutes.  Allow them to cool completely then move the baking sheet to the freezer.  Freeze them for about 1 hour, then transfer the balls to a freezer bag.  You can now freeze them and use them in different meals.  When you are ready to use them simply warm them up in the microwave, in your favorite sauce, or in the oven.  ENJOY!
 

Friday, August 3, 2012

Bathroom Remodel - supposed to be a 3 wk job, took closer to 8 wks

Before Picture

The old bathroom was boring!  The only storage was in the cabinet under the sink.  There were no drawers. The bathtub was extremely tiny.  We always referred to it as our "puddle."  

On the list for MUST HAVES in the new bath were:
Drawers, Medicine Cabinet, Larger/Deeper tub, and a fresh clean look!

We started out planning to rip out the tub & vanity and then give everything else a facelift.  By the end of day one we were down to this:

Needless to say, we quickly decided if we were doing this...we were doing it right...so we scrapped everything and started fresh!

First item up was a new tub:

When we took it for a test drive and the water was deep enough for our littlest to swim....we knew we had purchased the right tub!!

Next came the drywall & new floors.  After a lot of research we decided to go with luxury vinyl tile.  It was so easy to put down!  It's supposed to be super durable, and holds up well to kid traffic.  This was a MUST!  Over all I'm thrilled with how the new floors turned out:

The next big job was tiling & grouting the shower walls.  We definitely had some setbacks with this stage.  Both my husband and I made some lapses in judgement that lead to more work than we needed to do, but we finished it!!  Overall I like the look.  I got a great deal on the tile by buying it off someone who bought way too much for their shower project.  I love me a deal!  Makes me very happy!  


Last big piece of the puzzle was the new vanity.  This was probably my favorite part of the remodel!  After living with this bathroom for 10 years with no drawers, I was very excited to have some storage!!


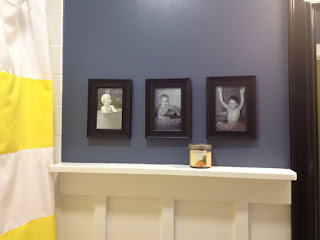
Finally it was time for all the cosmetic fun!!  Paint, moldings, new door, mirror...this was the fun part for me.  

We re-purposed the medicine cabinet from our master bathroom.
(That remodel still to come.)
Next it was time for the shower curtain.  Now if any of you know me, you'll know that I never seem to come up with ideas for things that are simple.  Usually what I have pictured in my head doesn't exhist.  And in this case....it was business as usual.  So when I realized that no one made a hortizontal striped yellow and white shower curtain, I had to make it myself.  (West Elm came close but theirs was more of a mustard yellow than a sunshine yellow.)  Problem was every idea I had came out to be very pricey.  So, after some digging, I found table cloths online for less than $7.50 each!!  (That price includes shipping!)  That means that I was able to make this shower curtain for less than $15!!!  Whoohooo!  I love a deal!  It did turn out to be a lot of work, but after about 8 hours of straight sewing...I had the perfect shower curtain!!  Worth it...if you ask me!

So, all that was left was the Board & Batton for the walls.  I was inspired to do this by a couple of blogs I saw on Pinterest.  Here's the link:
Obviously this is where I saw the shower curtain too.  However the lady from this blog chose to paint a bed sheet to get the look for her shower curtain.  I was concerned about how nice that would look and whether or not it would hold up to frequent washing.  (I have a house full of kids all the time so washability is essential!)  Anyway, I'm finally finished!  The bathroom is complete and here are the pictures of the finished product!!


Wednesday, April 11, 2012

Gluten Free Soft Pretzel Nuggets

I stumbled across a recipe on Pinterest one day for Soft Pretzels.  I have been wanting to come up with a recipe that my oldest could eat.  So I took this recipe:

I modified it using Gluten Free Pantry, French Bread & Pizza mix

This mix is my "go to" mix whenever I am trying a new recipe.  I've used it to make GF cutout cookies that turn out amazing as well!!  So, basically I followed the above recipe subbing this flour mix for the regular flour that the recipe calls for.  (FYI you don't have to bother measuring out the 4 1/2 to 5 cups of flour...just dump in the whole box, it's the exact right amount!!)  I used corn starch when I rolled out/kneaded my dough.  Because this is GF dough it's very difficult to shape into a classic pretzel shape.  GF dough just doesn't have the elasticity  of regular dough.  So to keep it simple and keep me from ripping out my hair, I decided to just cut the dough into nuggets.  (What kid doesn't want to gobble up a nugget!?)  I divided the dough into 4 sections, and went about dividing each section into 4 more sections.  Each one I rolled and squeezed into a rope and then simply cut each rope into several 1 inch size nuggets.  I followed all the remaining directions just as detailed on the above link.  They turned out amazing! 

 I watch children during the day...so on this particular day I had about 8 kids. (Two of which have Celiac Disease.)  I love to find interesting snacks that they all will enjoy equally.  This was a HUGE hit!  The first batch was GONE before the second was out of the oven.  The kids gobbled them up and were sad when they were all gone.  Next time I make these I'm going to try freezing half to see how they reheat.  I'll keep you posted on how this turns out.  I hope you try making these...it's a lot of steps but so so so good!!  (Also, next time I think we'll try shaking them up in cinnamon sugar...I think the kids will FREAK!)

ENJOY!!!

Monday, March 19, 2012

Mixer Cover

So, I was having trouble figuring out what to give my sister for her Birthday...  I was planning to make her a purse but my machine wasn't cooperating with the fabric I wanted to use.  So as I was sitting at my machine I saw my Kitchen Aide mixer sitting on top of my fridge and remembered how many times she'd mentioned wanted a cover for hers...  That was it!  So I sat down and came up with this.  I'm really happy with how it turned out.  It's even fully lined.  I think it's going to cheer up her kitchen with it sitting on top of her fridge.  I hope she enjoys it!!   Here are some photos:


Thursday, January 26, 2012

Re-Usable Swiffer Wet Jet Pads!

Yet again, I was sick of chucking out money for those refillable pads!  Every time I turned around I was out of them again.  So, here's my solution!  :o)  I already tried it out...it cleaned better than the pads and washed up great!!!  :o)

Wednesday, January 25, 2012

Re-Usable Swiffer Dusters!

Motivated by the inch of dust that was accumulating on my TV since I used my last Swiffer Duster, and re-fusing to go to the store to buy more, I decided to do something "green."  I made my own out of scrap fleece fabric I had in my stash!  (I must confess that my motivation was more out of saving $$ and less about being green, but the benefit is the same, right?!)  haha  Now I can dust my home and throw them in the wash instead of in the trash!  Genius!  Saw this idea on Pinterest, and actually followed through!  It's rare, but it does happen some times.  haha